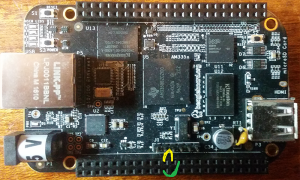
This is specific for the Beaglebone Black model C sold through Element 14 which includes retailers like Adafruit. There is quite a bit of info out on the net on how to enable the UART’s but for some reason, locations of things have changed.
To check if this instruction is going to be valid for you, check to see if you have a file ‘uEnv.txt’ in your /boot folder. NOT in /boot/uboot folder! If so, good chance you’ve found the right how-to for you.
Open /boot/uEnv.txt with nano
nano /boot/uEnv.txt
Add the line somewhere in the file, probably at the end is a good place
cape_enable=capemgr.enable_partno=BB-UART1,BB-UART2,BB-UART4,BB-UART5
This line will enable UART’s 1, 2, 4 and 5. Note, 0 is used by the console and 3 is a transmit only UART.
Save the file using CTRL-X followed by a Y and [ENTER].
Now reboot
reboot
Once it’s restarted, you can check to see if the UART’s have been enabled using
ls -l /dev/ttyO*
The O is a capital Oh not a zero.
You should expect to see:
crw-rw---- 1 root tty     247, 0 Nov 12  2015 /dev/ttyO0
crw-rw---T 1 root dialout 247, 1 Nov 12  2015 /dev/ttyO1
crw-rw---T 1 root dialout 247, 2 Nov 12  2015 /dev/ttyO2
crw-rw---T 1 root dialout 247, 4 Nov 12  2015 /dev/ttyO4
crw-rw---T 1 root dialout 247, 5 Nov 12  2015 /dev/ttyO5
To test it, you can use minicom in two ssh terminals with ttyO1 connected to ttyO2 like this:
First type
minicom -v
If minicom is not found, install using
apt-get install minicom
Using 4 pieces of jumper wire, connect P9_21 to P9_26 and connect P9_22 to P9_24 like what is shown in the picture:
Open two ssh terminals side by side. In the first ssh terminal run
minicom -b 9600 -D /dev/ttyO1
In the second ssh terminal run
minicom -b 9600 -D /dev/ttyO2
With the two terminals next to each other, type something in the first terminal and you should see it in the second terminal. Type something in the second terminal and it should also appear in the first terminal.
Use Ctrl-A then X to exit from minicom.
Happy developing with the Beaglebone black!
